[

      {
        "name": "Top Stories Video Pair",
        "insertPoint": "7",
        "component": "17087298",
        "parentWrapperClass": "fdn-ads-inline-content-block",
        "requiredCountToDisplay": "1"
      }

    ]
It's hot. Really, really hot, in a way that you lucky Humboldters may be lucky enough to only recall as a theoretical concept. I am sitting on my bed, huddled like a junkie over and under a precariously stacked slalom of fans whirring away in dissonant hums, waiting for the timer to ding its happy little ding to let me know my fragola is ready and I can ignore the heat in favor of food for a few minutes before beginning anew my battle against the omnipresent swelter.
In the midst of a Brooklyn July, when merely turning in bed involves sweat and it's difficult to discern between the steam from the subway grates and the actual air, it's hard to work up too much enthusiasm about cooking anything that involves an enclosed space, much less an oven. I make a lot of salads, it's true, but man cannot live on raw corn, jalapeno and cilantro alone (as much as I have been trying).
Working at a cheese counter means I can eat a lot of cheese and bread, which is a nice hot-weather thing, but only up to a point. We have maybe 60 to 70 cheeses at any one given time at the cheese counter, and at the risk of sounding like I'm kvetching about the most awesome underpaid job ever -- eating cheese -- when it's hot, there is only so much Epoisse, five-year Gouda and Robiola I can deal with. So lately I've been experimenting with some fresh homemade cheeses, at the instigation of my father, Darius "Make-it-myself" Brotman. I've been delighted to find they are easy to make, relatively cheap, and cold, fresh and delicious to eat. They are also very versatile.
Paneer, if you haven't eaten Indian in a while, is a delicate, crumbly, milk-tasting cheese from northern India. I just read that sentence and realized "milk-tasting" sounds retarded, but that's what it is: very fresh, sweet and quiet, tasting like a concentrated version of whatever milk you used, which I suppose it is. This means, of course, you need to use the nicest-tasting milk you can get, which to my palate is organic. I am not a believer that all things organic taste better (hello, flaccid kumquats?) but I have found organic milk is really preferable. Whether this is true in Humboldt where the cows that give milk are 10 feet from my bedroom window -- closer, when the fence busts -- I am not sure. The point is, if you don't smack your lips drinking it straight, don't use it for paneer.
So as I said, paneer is easy to make. You do need to pay attention. Milk scorches easily, so use a heavy-bottomed pan. Keep an eye on it -- it takes a while to come up to just below simmering, so you can go away and smoke for three minutes at the beginning, but make sure to keep an eye on it, stir every few minutes and keep the heat low, low, low. As far as I can tell scorching the milk is the only way to screw this up.
Paneer
Cooking time: 15 - 20 minutes
Draining time: at least 45 minutes, up to two hours
Ingredients:
1 gallon milk that tastes nice. This should give you two or three cups paneer. Halve it if you need half.
Strained juice of two lemons (One T. per quart of milk)
Cheesecloth. (Not an ingredient per se, but something you'll need.) Get a large-ish piece and fold it over to make a square at least 16 inches -- uh -- square, with a thickness of at least five layers. More layers are fine, fewer are not. A clean towel also works, but since I work at a place that sells high-end cheese and supplies, I have access to yards of cheesecloth.
Preparation:
Set the milk up to heat over low heat, in a heavy-bottomed saucepan.
As the milk is readying, stir it every few minutes. Get your lemon juice ready. Place your cheesecloth in a strainer, with the edges hanging over the edge so you can pull them up. You are going to pour the milk through the cheesecloth square and pull the ends up to tie, so make sure there is enough hanging so you can grasp the cloth and its edges don't get pulled into the morass of hot curd. (Then you have to poke around and burn your fingers and lose precious curd.) Actually if you can have someone else slowly pour the milk into the cloth while you hold the edges securely around the strainer's edges that'd be best. I hate meddlers so I do it myself, which is feasible via very slow pouring.
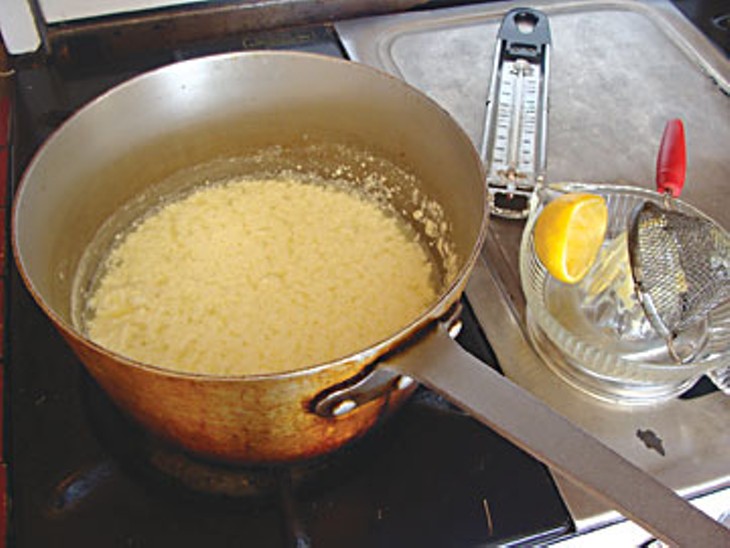
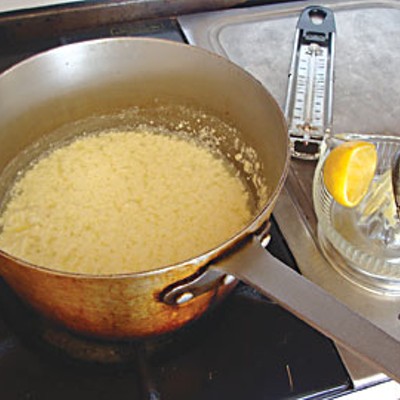
When the milk comes up to just below a simmer pour in the lemon juice. You can tell when it is around the right temp: when bubbles appear. Not tiny ones. Look, here's what will happen. One: Milk will gradually thicken at about 12 minutes. Don't leave the stove now. Two: Little bubbles will appear. Are you stirring? Not frantically, but don't ignore the stir. Three: At around 15 to 18 minutes the bubbles get a little bigger. Not boiling big, just, well ... right below the simmer. Now, add the juice.
Reduce the heat and stir continuously until the milk is completely curdled. It will. It looks gross. Kinda like that "Brain Hemorrhage" drink at the Alibi that's Bailey's, peach schnapps and grenadine. That's fine. It takes maybe five minutes to curdle up.
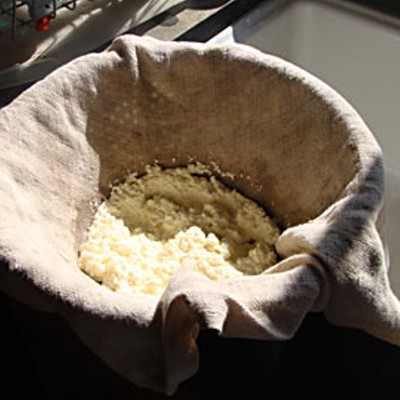
Strain the mixture by pouring through your cheesecloth slowly, so it doesn't overflow and so you don't splash and burn yourself and/or your meddling helper.
Carefully gather up the edges of the cloth and hoist them up so the curds are in the middle of your newly formed sack. Hold it up and let it drain a little. Tie the edges together.
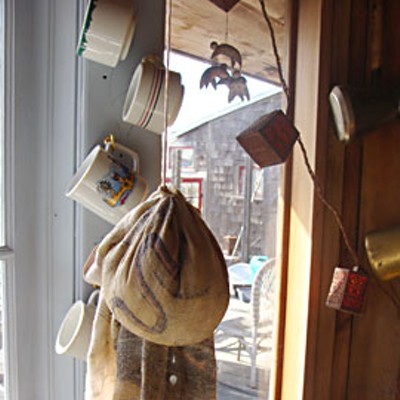
Hang your sack over the sink on a nail or something for at least 45 minutes so that all the whey is drained out.
If you want it square-ish and extra dense you can put it under a frying pan weighted with a brick for another half hour I hear. I see no reason to bother. I just carefully peel off the cheesecloth and put my paneer ball into a convenient clean old yogurt container.
Done, son! Yummy paneer! Taste it. Bland, but nice and fresh and creamy. And you can make some great things with it, a few of which I will detail. But in the meantime take a minute to be smug. If you need more than a few minutes store your paneer in the fridge. Especially if you're in Brooklyn and it's 95 degrees.
Fregola Brotman
Fregola is a lovely Italian hand-toasted semolina pasta in the shape of tiny spheres. Each one is a unique toast so the cooked bowl is a variety of toasty flavors and firmness. If they don't have it at your local grocery store, ask them to order it, it's not that rare or fancy. If you can't get it, orzo works just as well.
For three people.
3/4 cup paneer, cut into small cubes or crumbled into small chunks, chilled
3 cups cooked fregola, warm and drained, tossed with 2 tablespoons butter and a drizzle of olive oil
1/2 cup each minced fresh watercress, basil, chives and parsley
2 cloves garlic, minced really fine or put through a press
1/2 cup coarsely chopped toasted walnuts or 1/4 cup toasted pinenuts
salt and pepper to taste
Mix all ingredients, eat immediately.
Paneer Sammitch
Ingredients:
1 cup paneer, finely crumbled
2 tablespoons cream
1 tsp cumin seeds
1 yellow onion, minced
1 green chili chopped very fine, not super hot. I like jalapeno.
1 medium tomato chopped fine
handful chopped fresh cilantro and/or same amount chopped fresh mint
1/4 tsp turmeric powder
1/2 tsp red chili powder (optional)
Salt to taste
8 slices bread. I like to buy a nice artisanal loaf of a nutty oaty bread and cut fairly thick slices.
Butter
Preparation:
Heat a pan on a medium flame and add the butter to it. Allow to melt and then add the cumin seeds. When they stop spluttering, add the green chilies and onion. Fry till the onion is soft.
Add the tomato, turmeric powder, red chili powder and salt to taste. Stir well. Cook for 2 minutes, stirring all the while.
Add the paneer and mix well. Add cream. Cook for 2 minutes. Taste. You might add a little lemon juice if you fancy it. Remove from heat. Allow to cool a little.
Lay the slices of bread on a clean cutting board. Put a generous amount of the prepared paneer mixture on four of the slices. Spread to cover entire slice. Top with another slice.
Grill like you would a grilled cheese, on a medium hot skillet with plenty of butter. Serve with a coriander or tomato chutney.
Peas and Paneer a la Pop
Serves four.
Ingredients:
4 tablespoons ghee, which is Indian-style clarified butter. Or plain butter if like me you are lazy. Ghee is nicer though.
1 t. salt
1 t. cumin, powdered or seeds
1/2 t. cayenne
1 t. coriander, powdered or seeds
2 cups fresh shelled green peas. Not as time-consuming as it sounds and worth it.
2/3 cup paneer, rolled into pea-sized balls
Preparation:
Heat a cast-iron skillet over medium heat, and toast salt, cumin, coriander and cayenne for a minute till aromatic. If you are using whole cumin and coriander seeds, which is preferable, remove the mixture to a mortar and pulverize with a pestle. Return to pan.
Add ghee. Melt. Add peas, lower heat and cook 15 minutes, shaking pan every few minutes.
Meanwhile, heat two cups of peanut oil in a small saucepan over medium heat, until a tiny piece of paneer browns in 15-20 seconds when added. Fry paneer balls, no more than four at a time as they must not touch during cooking or they will stick, as well as lowering the oil temperature too quickly. Place on paper towel to drain as they come out of the fat.
Mix paneer with peas, serve immediately.
more from the author
-
Figgin' Delicious
Fresh fig bar cookies (that are secretly gluten free)
- Sep 7, 2017
-
High on the Hog
- May 18, 2017
-
Winter Simmer
Turkish, Iranian and Russian-Jewish soups
- Mar 16, 2017
- More »
